Pillowcase Dress Tutorial
Happy New Year!
And with the new year, I've decided to take care of some unfinished business.
I had promised a Pillowcase Dress tutorial, and here it is! I finally finished it and am really excited to share it with you. Hopefully you'll be inspired to sew one of your own, maybe even get some friends together and have a sewing party!

This pillowcase dress tutorial was originally designed for the Little Dresses for Africa event that was hosted by Emily from Mothers, Daughters. This is a very basic tutorial for the beginner sewer!
You only really need buy two things: a pillowcase, and two yards of double fold bias tape!
click HERE for a pdf of the tutorial. Thank you wordpress for supporting pdf uploads.
Steps:
1. On the pillowcase, there will be a sewn end, and an open, hemmed, end. Cut off 2.5” at the sewn end. Reserve the scrap.


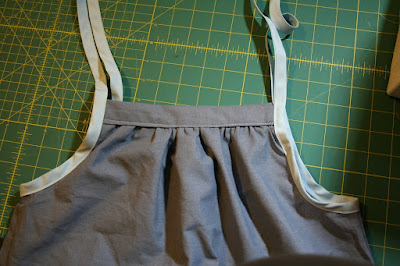
13. Cut two 1 yard pieces of double fold bias tape. Optional: open the tape, and turn the ends under ¼” on each end; press or pin closed.
14. Open the bias tape and mark the ½ yard point on the bias tape with a pin. Pin to the armpit fold of the dress. Wrap the bias tape around the raw edge of the armhole and repin to hold in place.


